What is Teeth Whitening on Pictures?
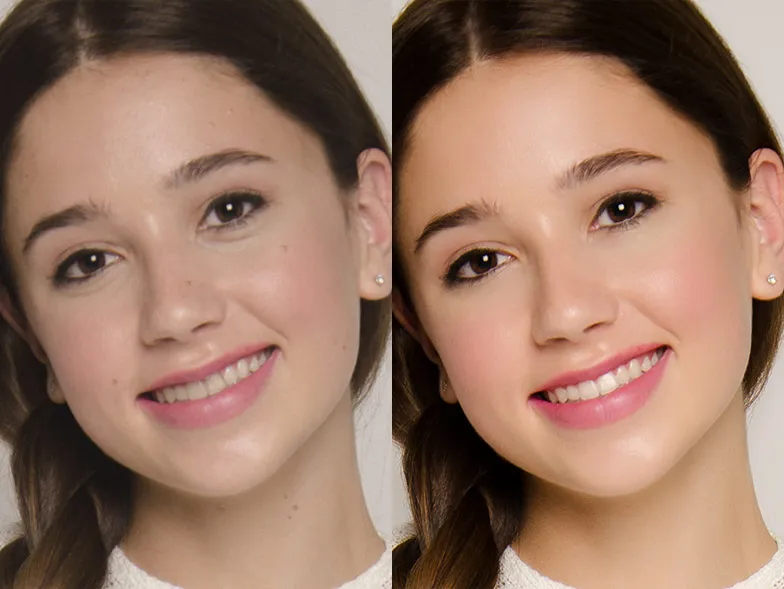
Teeth whitening on pictures is the process of digitally enhancing the appearance of teeth in a photograph to make them appear brighter and whiter. This can be achieved using a variety of photo editing software, from professional desktop applications like Adobe Photoshop and Lightroom to user-friendly mobile apps. The goal is to improve the overall aesthetic of the image by creating a more visually appealing smile. It’s a common practice in portrait photography, social media posts, and even product photography to enhance the perceived attractiveness of the subject.
Why Whiten Teeth in Photos?
There are several reasons why people choose to whiten teeth in photos. Firstly, it can improve the overall look of a portrait, making the subject appear healthier and more vibrant. Discoloration of teeth can be caused by various factors, including aging, diet, and lifestyle choices, and photo editing offers a way to counteract these effects. Secondly, it’s often used to create a more polished and professional image, particularly in headshots or professional portraits. Finally, on social media platforms, where visual appeal is paramount, teeth whitening can boost confidence and enhance the overall impression a person makes. It’s about making the most of an image.
Common Photo Editing Software Options

The market is flooded with options when it comes to photo editing software, but certain programs stand out for their teeth whitening capabilities. Adobe Photoshop and Lightroom are industry standards, offering comprehensive tools and precise control for advanced users. For those seeking simplicity, there are numerous mobile apps available that provide one-tap solutions or simple adjustment sliders. The choice of software often depends on the user’s skill level and the complexity of the desired outcome, from simple touch-ups to intricate image manipulations.
Adobe Photoshop for Teeth Whitening
Adobe Photoshop is a powerhouse for photo editing, providing a wide array of tools for teeth whitening. Its precision and control make it a favorite among professionals. The software allows for meticulous adjustments and the ability to address complex lighting and color issues. While it may require more time to master, the results can be exceptional, offering a natural and seamless look. Photoshop’s advanced features allow for detailed work and the ability to handle difficult cases. Using Photoshop often yields the best results when taking the time to do it properly.
Accessing and Preparing the Image
Begin by opening the image in Photoshop. Make sure the image has enough resolution and the teeth are visible and sharp. Consider any initial color corrections or adjustments before starting to whiten the teeth. Cropping and basic color adjustments can be necessary initial steps to ensure the best results before focusing on the teeth. Proper preparation is key to achieving a natural and appealing outcome.
Selecting the Teeth with Precision

The key to a successful whitening is accurately selecting the teeth. Use tools like the Lasso tool, Quick Selection tool, or Pen tool to carefully outline each tooth. This allows for precise adjustments without affecting surrounding areas. Take your time to ensure the selection is accurate, as a sloppy selection can lead to unnatural results. Zoom in to get a closer look and refine the edges of your selection.
Applying the Whitening Effect
Once the teeth are selected, create an adjustment layer, such as Curves or Levels. Experiment with these adjustments to brighten the teeth. Be subtle and adjust the settings carefully, so the effect is not too drastic. Reducing the saturation slightly can also help to prevent the teeth from looking artificial. The goal is to enhance the color and brightness of the teeth in a way that complements the overall image.
Refining and Adjusting
After applying the whitening effect, fine-tune the adjustments. Reduce any harsh edges or unnatural tones by softening the selection or using a Gaussian blur. Use the Dodge and Burn tools to enhance the contrast or to address any unevenness in the teeth. Keep a close eye on the overall image and make sure the teeth look natural and harmonious with the rest of the photo. The final touches are crucial to achieving a flawless result.
Lightroom for Teeth Whitening

Adobe Lightroom is another powerful tool for photo editing, offering a streamlined workflow and user-friendly interface. It is especially well-suited for batch processing and quick adjustments. Lightroom provides tools that make teeth whitening relatively easy, but also allows for detailed control. While it may not offer the same level of control as Photoshop, it is faster and more accessible, making it a great choice for beginners and those who prefer a simpler approach.
Importing and Organizing the Image
Start by importing the photo into Lightroom and organizing it within your library. This allows you to manage and edit your photos efficiently. Make sure the image is properly exposed and color-balanced before starting the whitening process. Using the organizational tools of Lightroom can save you time and effort, especially when editing multiple images.
Using the Adjustment Brush for Teeth
The Adjustment Brush is a crucial tool in Lightroom for teeth whitening. Select the Adjustment Brush and carefully paint over the teeth. Use the brush settings to adjust the size, feather, and flow for precise application. This allows you to target the teeth without affecting the surrounding areas. The Adjustment Brush helps to refine areas quickly and easily.
Adjusting Exposure and Color

Once the brush is applied, adjust the exposure, highlights, and whites sliders to brighten the teeth. Reduce the saturation to avoid an unnatural look. The color temperature can also be adjusted to make the teeth appear less yellow. Start with small adjustments and observe how the changes affect the image. Lightroom provides immediate feedback, so you can quickly fine-tune the results.
Mobile Apps for Teeth Whitening
Mobile apps have revolutionized photo editing, making teeth whitening accessible to everyone. These apps often offer one-tap solutions and a variety of editing tools for easy touch-ups on the go. While they might not offer the same level of control as desktop software, they are convenient and efficient for quick edits. The choice of app can depend on the user’s preferences and their need for advanced features or simplicity.
Popular Apps for Instant Whitening
Several mobile apps stand out for their teeth whitening capabilities. Apps like Facetune, AirBrush, and YouCam Perfect are popular choices, offering user-friendly interfaces and automated features. They typically provide sliders or simple controls to adjust the brightness and color of teeth. These apps are ideal for quick touch-ups and social media posts. The ease of use makes them perfect for beginners, and their results can be impressive.
Editing Steps on Mobile

The editing process on mobile apps is typically straightforward. After opening the image, navigate to the teeth whitening tool. Select the teeth using the automatic selection feature or manual selection tools. Adjust the brightness and whiteness sliders until you are happy with the results. Most apps also offer a feature to reduce yellowing. Don’t forget to save the edited image or share it directly on social media.
Advanced Techniques for Natural Results
Achieving a natural look is the key to successful teeth whitening on pictures. Over-whitening can lead to an artificial appearance that doesn’t complement the image. Pay attention to subtle details and avoid excessive changes. The goal is to enhance the appearance of the teeth without drawing unwanted attention. Practice and patience will enhance the ability to achieve a polished, natural look.
Avoiding Over-Whitening
Over-whitening is the most common mistake in teeth whitening. It results in teeth that look unnaturally bright and out of place. To avoid this, start with small adjustments and gradually increase the whitening effect. Always compare the edited image with the original to ensure a natural look. The aim is to enhance the image, not to completely alter the subject’s appearance.
Dealing with Shadows and Highlights

Pay attention to the shadows and highlights on the teeth. If the whitening effect is too uniform, the teeth will appear flat. Use the Dodge and Burn tools or local adjustments to preserve the natural shadows and highlights. This adds depth and realism to the image. Adjusting the highlights can also bring a more natural appearance to the photo. Ensure the lighting is consistent across the teeth to maintain a sense of realism.
Color Correction and Balance
Color correction is essential to create a natural look. Adjust the color temperature to match the rest of the image. Reducing the yellowing is usually a good start. Make sure the teeth color matches the surrounding skin tones. Use the color grading tools to fine-tune the overall balance. The final result should look cohesive and harmonious.
Tips for Perfect Teeth Whitening on Photos
Teeth whitening on photos can significantly enhance an image, and understanding the basic techniques is essential. Achieving great results requires attention to detail and the application of some key tips. Consistency, patience, and practice are your best allies. Experimenting with different tools and techniques will help you master the art of teeth whitening and achieve professional-looking results.