Understanding Teeth Whitening Pictures
Teeth whitening pictures are a crucial element in understanding and evaluating the effectiveness of various teeth whitening procedures. They serve as visual documentation, allowing both dentists and patients to track progress, compare different methods, and assess the overall impact on the appearance of the smile. These images are not just for aesthetic comparison, but also provide essential insights into the health and condition of the teeth and gums before, during, and after treatment. They play a vital role in setting realistic expectations and ensuring patient satisfaction, offering a clear picture of what to expect from the teeth whitening journey. The pictures capture the nuances of color change, highlighting the subtle transformations that can significantly enhance a smile’s brightness and appeal, which serves as a guide on the processes.
What are Teeth Whitening Pictures?
Teeth whitening pictures encompass a range of photographic documentation used in the context of dental cosmetic procedures. They include images taken at various stages of the teeth whitening process, from initial consultations to post-treatment follow-ups. These pictures typically showcase the teeth’s shade before and after the procedure, providing a tangible comparison of the results. High-quality images capture minute details, such as tooth color, surface texture, and any existing dental work. Different types of photography like intraoral and extraoral shots are used, each serving a specific purpose in illustrating the changes brought about by the teeth whitening process. This visual record helps to provide clear, concise evidence of the procedure’s effectiveness and helps patients understand how their smile is evolving.
Why are Teeth Whitening Pictures Important?

Teeth whitening pictures are essential for several reasons, primarily because they provide an objective method for assessing treatment outcomes. They allow dentists and patients to track the whitening progress, making it easier to assess the effectiveness of the chosen method. In addition, these pictures serve as a vital communication tool, helping patients understand the changes happening to their teeth and managing their expectations. They enable comparison, and showcase before-and-after views that highlight improvements in the teeth’s shade and overall appearance. Furthermore, in professional settings, these images can be used for documentation, quality control, and as a reference for future procedures, thus reinforcing their importance in teeth whitening procedures.
Types of Teeth Whitening Pictures
Different types of teeth whitening pictures offer varied perspectives and are crucial for a comprehensive assessment. These photos provide the necessary information to get the best results. Different photos can capture different aspects of teeth and also the effectiveness of the process.
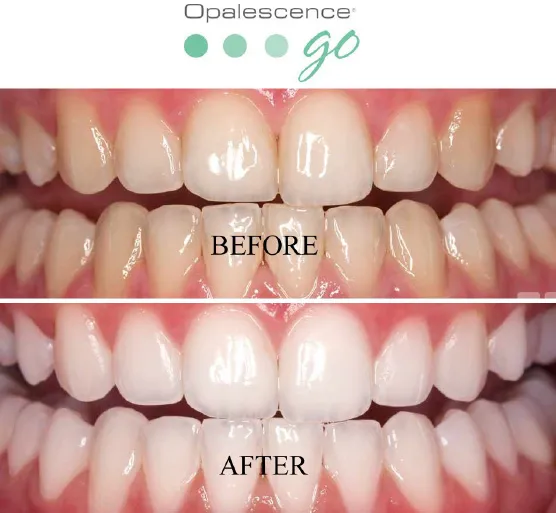
Before and After Photos
Before and after photos are the most common and perhaps most impactful images in teeth whitening. They show the dramatic transformation of a patient’s smile, illustrating the initial shade of the teeth and the final, brighter result achieved after the whitening procedure. These pictures are vital for demonstrating the effectiveness of the treatment. Moreover, they allow potential patients to visualize the possible outcome of the procedure, setting realistic expectations. The contrast between the before and after images is a powerful tool that helps in patient education and in showcasing the benefits of teeth whitening. These images often become the primary source of patient motivation, as they provide a clear and encouraging vision of a brighter smile.
Close-up Shots

Close-up shots are detailed photographic images that focus on specific aspects of the teeth. These images help in highlighting the nuances of the whitening process, like the teeth’s surface texture, any existing dental work, and the subtle changes in shade across the teeth. These photographs provide a clear, detailed view, which is essential for a comprehensive understanding of the whitening procedure’s impact. Furthermore, close-up shots are important for assessing the condition of the teeth and gums, ensuring the patient’s dental health before any whitening treatments. They are used to showcase how the procedures are changing the teeth color from dark to white color.
Procedure Process Pictures
Process pictures document each step of the teeth whitening procedure, providing a visual guide to the treatment process. These images showcase how the whitening agent is applied, the use of any specialized equipment, and the overall steps involved in both in-office and at-home treatments. For potential patients, these images can clarify the procedure and reduce anxiety. Process pictures also serve an important role in ensuring proper technique and standardization in the dental practice, making sure that the procedures are performed correctly. This detailed visual documentation is essential for dental professionals. It is also used to educate patients, and to provide a visual reference for training and quality control.
Teeth Whitening Procedures
Several teeth whitening procedures are available, each with its specific methods and outcomes, and the choice depends on individual needs and preferences. Understanding the processes and outcomes will help you to choose the best option for you. Procedures are varying from dentist office to at-home. The procedures are described below to help you.
In-Office Whitening Pictures

In-office teeth whitening involves professional treatments performed in a dentist’s office. These procedures use strong whitening agents, typically with a high concentration of hydrogen peroxide or carbamide peroxide, and often combine the application of the whitening gel with the use of a specialized light or laser to accelerate the whitening process. The procedures are carefully monitored by the dentist to ensure the safety and effectiveness of the treatment, which usually provides instant results. In-office whitening pictures showcase the direct effects of these procedures. These images capture the transformation of the teeth from the initial shade to a significantly brighter, whiter appearance, often achieved within a single session. The pictures serve as a compelling demonstration of the procedure’s speed and efficiency and are crucial in illustrating the immediate impact of professional teeth whitening.
At-Home Whitening Pictures
At-home teeth whitening involves the use of whitening products prescribed by a dentist or purchased over-the-counter, to be used by the patient at home. The procedures include custom-fitted trays and whitening gels or whitening strips. The process typically involves applying the whitening product consistently over a period of time, following the instructions. At-home whitening pictures are essential for tracking the progress and evaluating the effectiveness of these treatments. The photos display the subtle, gradual changes in tooth color that occur over weeks. Before and after images provide a tangible record of the improvements in the patient’s smile. They also demonstrate the consistency required for successful at-home whitening, as the images highlight how the result is achieved through regular use of the product.
Over-the-Counter Products Pictures
Over-the-counter (OTC) teeth whitening products, such as whitening strips, toothpastes, and gels, are widely available for purchase without a prescription. These products contain lower concentrations of whitening agents compared to those used in professional treatments. Pictures of these products are important in showcasing the outcomes achieved with OTC methods. These images illustrate the gradual changes in tooth shade that occur with regular use, with the goal of demonstrating the product’s effectiveness. These photos are essential in managing patient expectations, as they show the realistic results achievable with OTC products. Moreover, these pictures support the products and provide a visual representation of what consumers can expect in terms of whitening results, contributing to consumer awareness and promoting the usage of the product.
How to Take Effective Teeth Whitening Pictures

Capturing effective teeth whitening pictures involves a combination of proper techniques and attention to detail to ensure accuracy and clarity. It’s important to use the correct techniques so that you can see the progress of your treatment and to communicate well with the dentist.
Lighting Techniques
Proper lighting is critical for capturing clear and accurate teeth whitening pictures. It ensures that the true shade and surface of the teeth are visible. Even, soft lighting is ideal to avoid harsh shadows. Using natural light, or a well-lit setting, is best. In a dental setting, ring lights or professional studio lights are often used. These light sources provide consistent illumination, ensuring that the teeth’s true color is accurately represented in the images. To avoid glare, and ensure the teeth look accurate, it is important to make sure there are no strong direct light sources.
Camera Settings
Adjusting camera settings to optimize the pictures is essential. Use a high-resolution setting to capture all the details. Make sure that the pictures are sharp. Using a macro lens, if available, allows for close-up shots. If you are using a smartphone, make sure that the camera settings are right. Adjust the ISO, aperture, and white balance settings for the best quality. Focus on maintaining the stability of the camera while taking the picture. Use a tripod to get the best results. By carefully adjusting these settings, you can make sure that the images are clear.
Angles and Composition

The correct angles and composition can enhance the pictures. Take front-facing shots to showcase the entire smile. Use side profiles to show the overall shape of the teeth. Take close-up shots. For consistency, ensure that each picture is taken from the same angles. Including a color guide or a shade tab in the pictures will help in determining the shade of the teeth. Make sure that there are no obstructions or distractions. Taking pictures from multiple angles, and properly framing the images, ensure clarity, which helps in assessing the teeth whitening process.
Maintaining Your White Smile
After successfully whitening your teeth, proper maintenance is essential to prolong the results. This includes a blend of good habits and routines designed to help maintain your white smile for a long time. With the right care, you can continue to have a bright and appealing smile. The key to maintain a bright smile involves several practices.
Post-Whitening Care
Post-whitening care involves the specific steps you should take to protect your teeth after the teeth whitening procedure. Avoid food and drinks, like coffee, tea, red wine, and dark-colored sauces, that can stain your teeth. Avoid smoking. Use a soft-bristled toothbrush and non-abrasive toothpaste. Use fluoride toothpaste for improved results. If there is any sensitivity, use a toothpaste specially made for sensitive teeth. By adhering to these recommendations, you will improve the longevity of your white smile.
Regular Dental Check-ups

Regular dental check-ups are essential to maintain the results from the teeth whitening procedure. During your routine visit, the dentist will check the health of your teeth and gums, which will help to identify any potential issues. The dentist can provide professional cleanings and polish, which will help in removing any stains and maintaining brightness. The dentist can assess the performance of the teeth whitening and suggest additional touch-ups if required. To keep your smile healthy and bright, it is important to make sure that you are doing the best practices that your dentist recommended.